Selected work · 2025
Mark1
A custom split keyboard designed from the PCB up.
Building the next keyboard
Mark1 is a custom split mechanical keyboard that I designed and built from the ground up.
I was always curious about split key keyboards from an ergonomics perspective. I spend a lot of time typing each day, why should I constantly have both my wrists and elbows bent? A split keyboard setup allows you to keep your forearms in line with your shoulders and your wrists straight while typing, which is apparently a lot better for your body. I was also interested in trying a keyboard layout other than QWERTY. Honestly, the first reason was the shock factor of handing someone your keyboard, they try to type something and fail hilariously. But that’s not reason enough to merit an entire project, and frankly that could be achieved -without- purchasing a new keyboard. The ‘legitimate’ reason was the knowledge that QWERTY was inefficient by design and the curiosity of what kinds of speeds I could be reaching with an optimized layout and better typing habits, which I thought would be easier to train with the ‘fresh start’ of a new board rather than just changing the keymapping on one of my current keyboards.
Well, all that sounds great, but why is every split keyboard like $400? There is a serious gap in the market. Just kidding, I know it’s because the custom keyboard community is small and its simply not worth the effort if youre not making $100s in margin on every sale.
I’ve picked the parts and assembled several keyboards in my time, and now that there’s an economic and intellectual exuse, why not design my own?
Learning PCB design
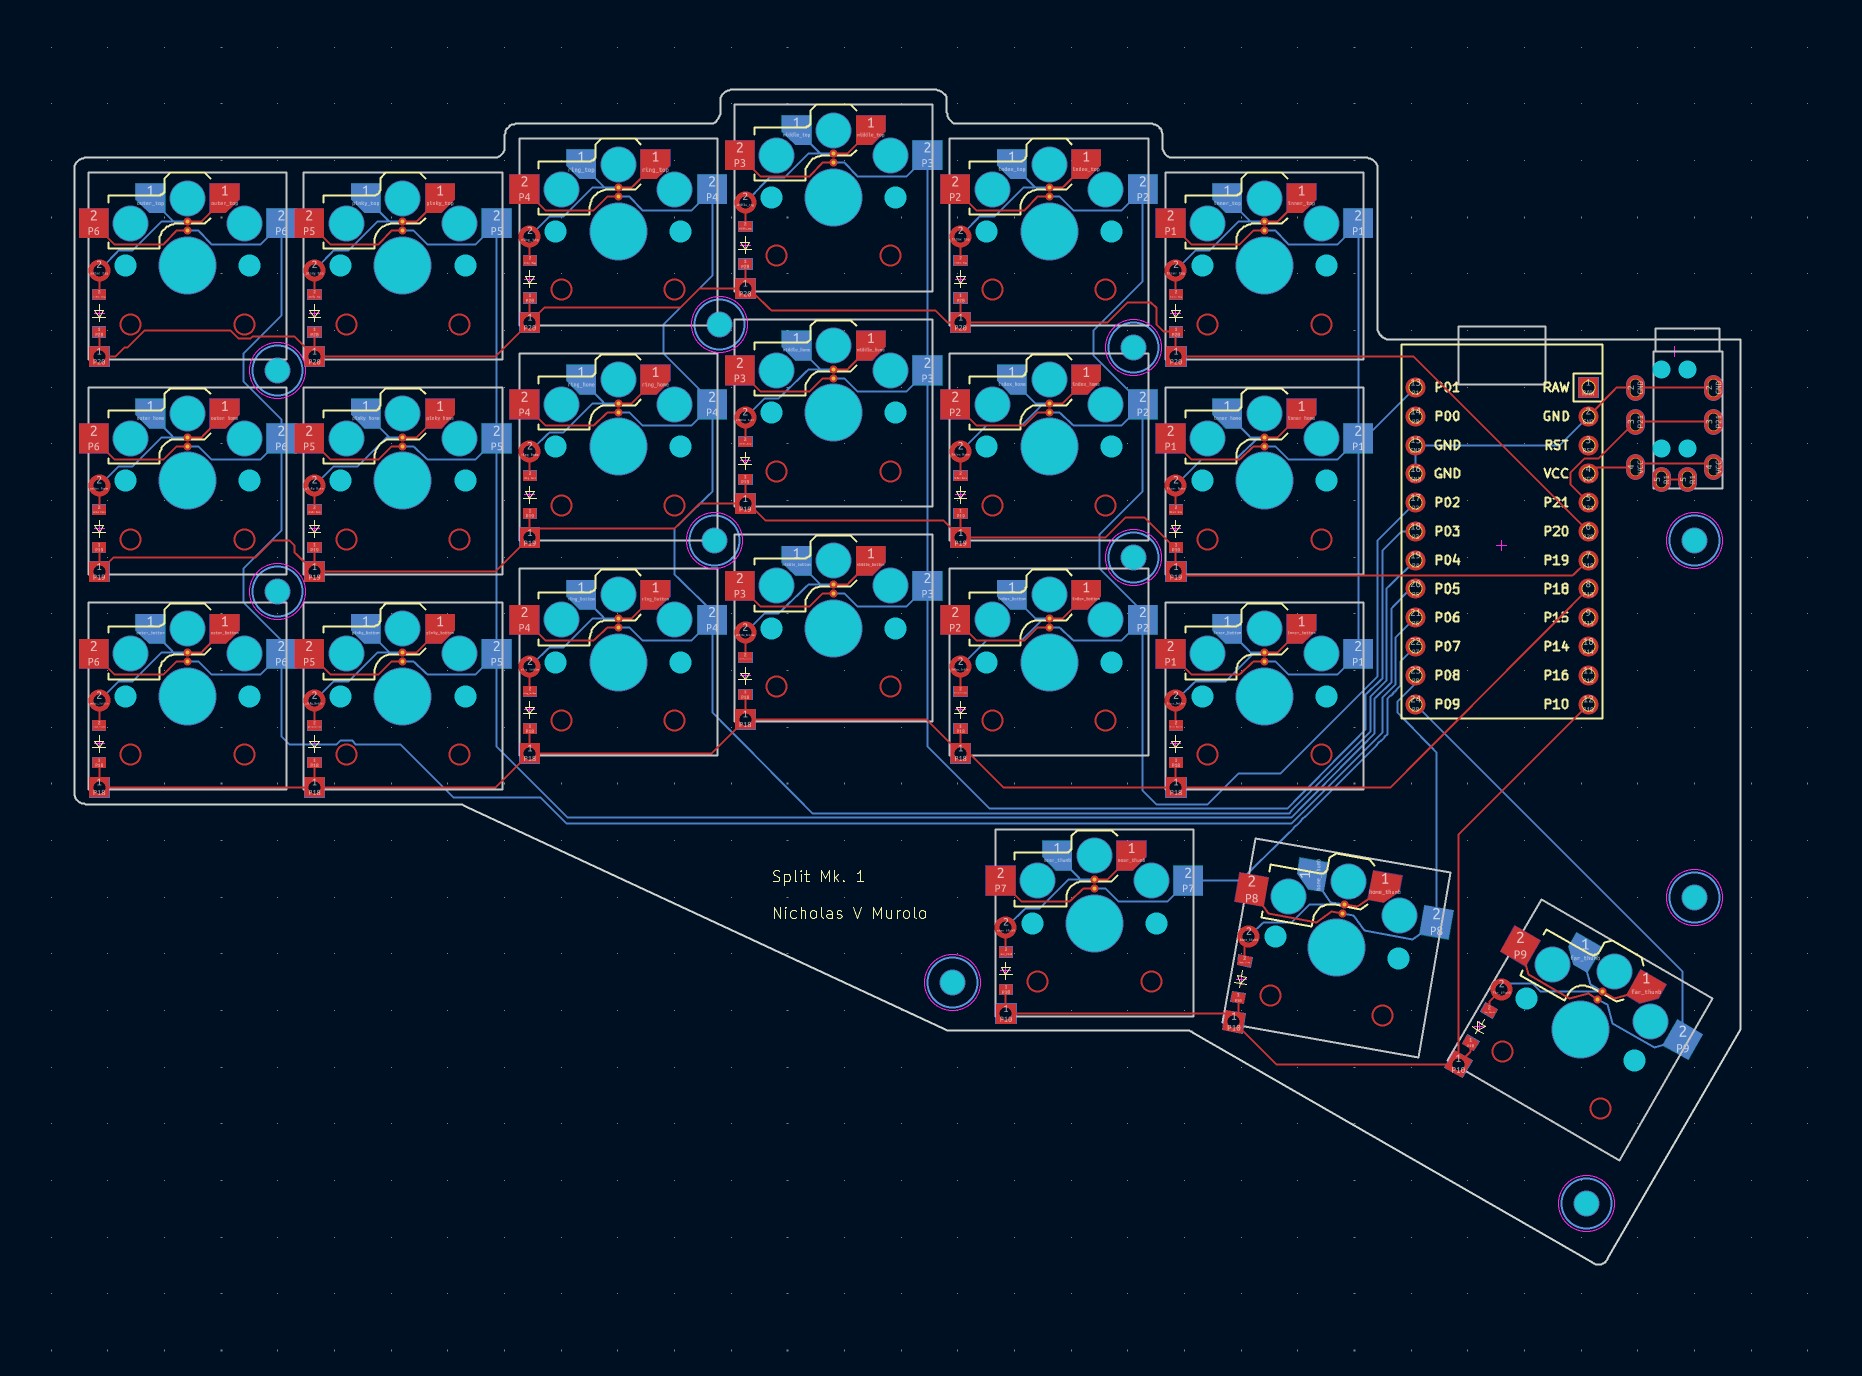
Mark1 was my first PCB design. I learned the fundamentals from scratch through YouTube tutorials before creating the board in KiCad. I used a tool called ErgoGen to help create the layout of the board and key spacing ahead of time, so all I had to worry about was which components to use and where to route traces.
One of the primary design goals was to make the PCB fully reversible. Instead of manufacturing separate left- and right-hand boards, the same PCB can be flipped and assembled for either half of the keyboard. This reduced the number of unique parts required and made the design easier to manufacture and maintain.
Designing the board required creating the keyboard matrix, placing the switches and electronic components, routing traces, and accounting for the physical shape of both the keys and the enclosure. Once the boards were manufactured, I soldered and assembled each half myself.
I used JLCPCB for fabrication. It was surprisingly affordable, it was less than 40 bucks to get my hands on 5 boards (the MOQ). I (embarassingly) forgot to send the drill files the first time around, which they kindly let me know soon enough that the board wasn’t delayed.
Firmware and keymaps
I used QMK to create the keyboard’s firmware. I defined the hardware configuration, created the keymaps, and configured the keyboard around the Workman layout. I chose this layout because it had good balance between right and left hand usage, as well as good placement of the most common letters on the homerow.
After writing the configuration and keymap files, I compiled and flashed the firmware onto both halves. This part of the project connected the physical PCB design to a fully functional keyboard and gave me practical experience working with embedded firmware and keyboard matrices.
Designing the case
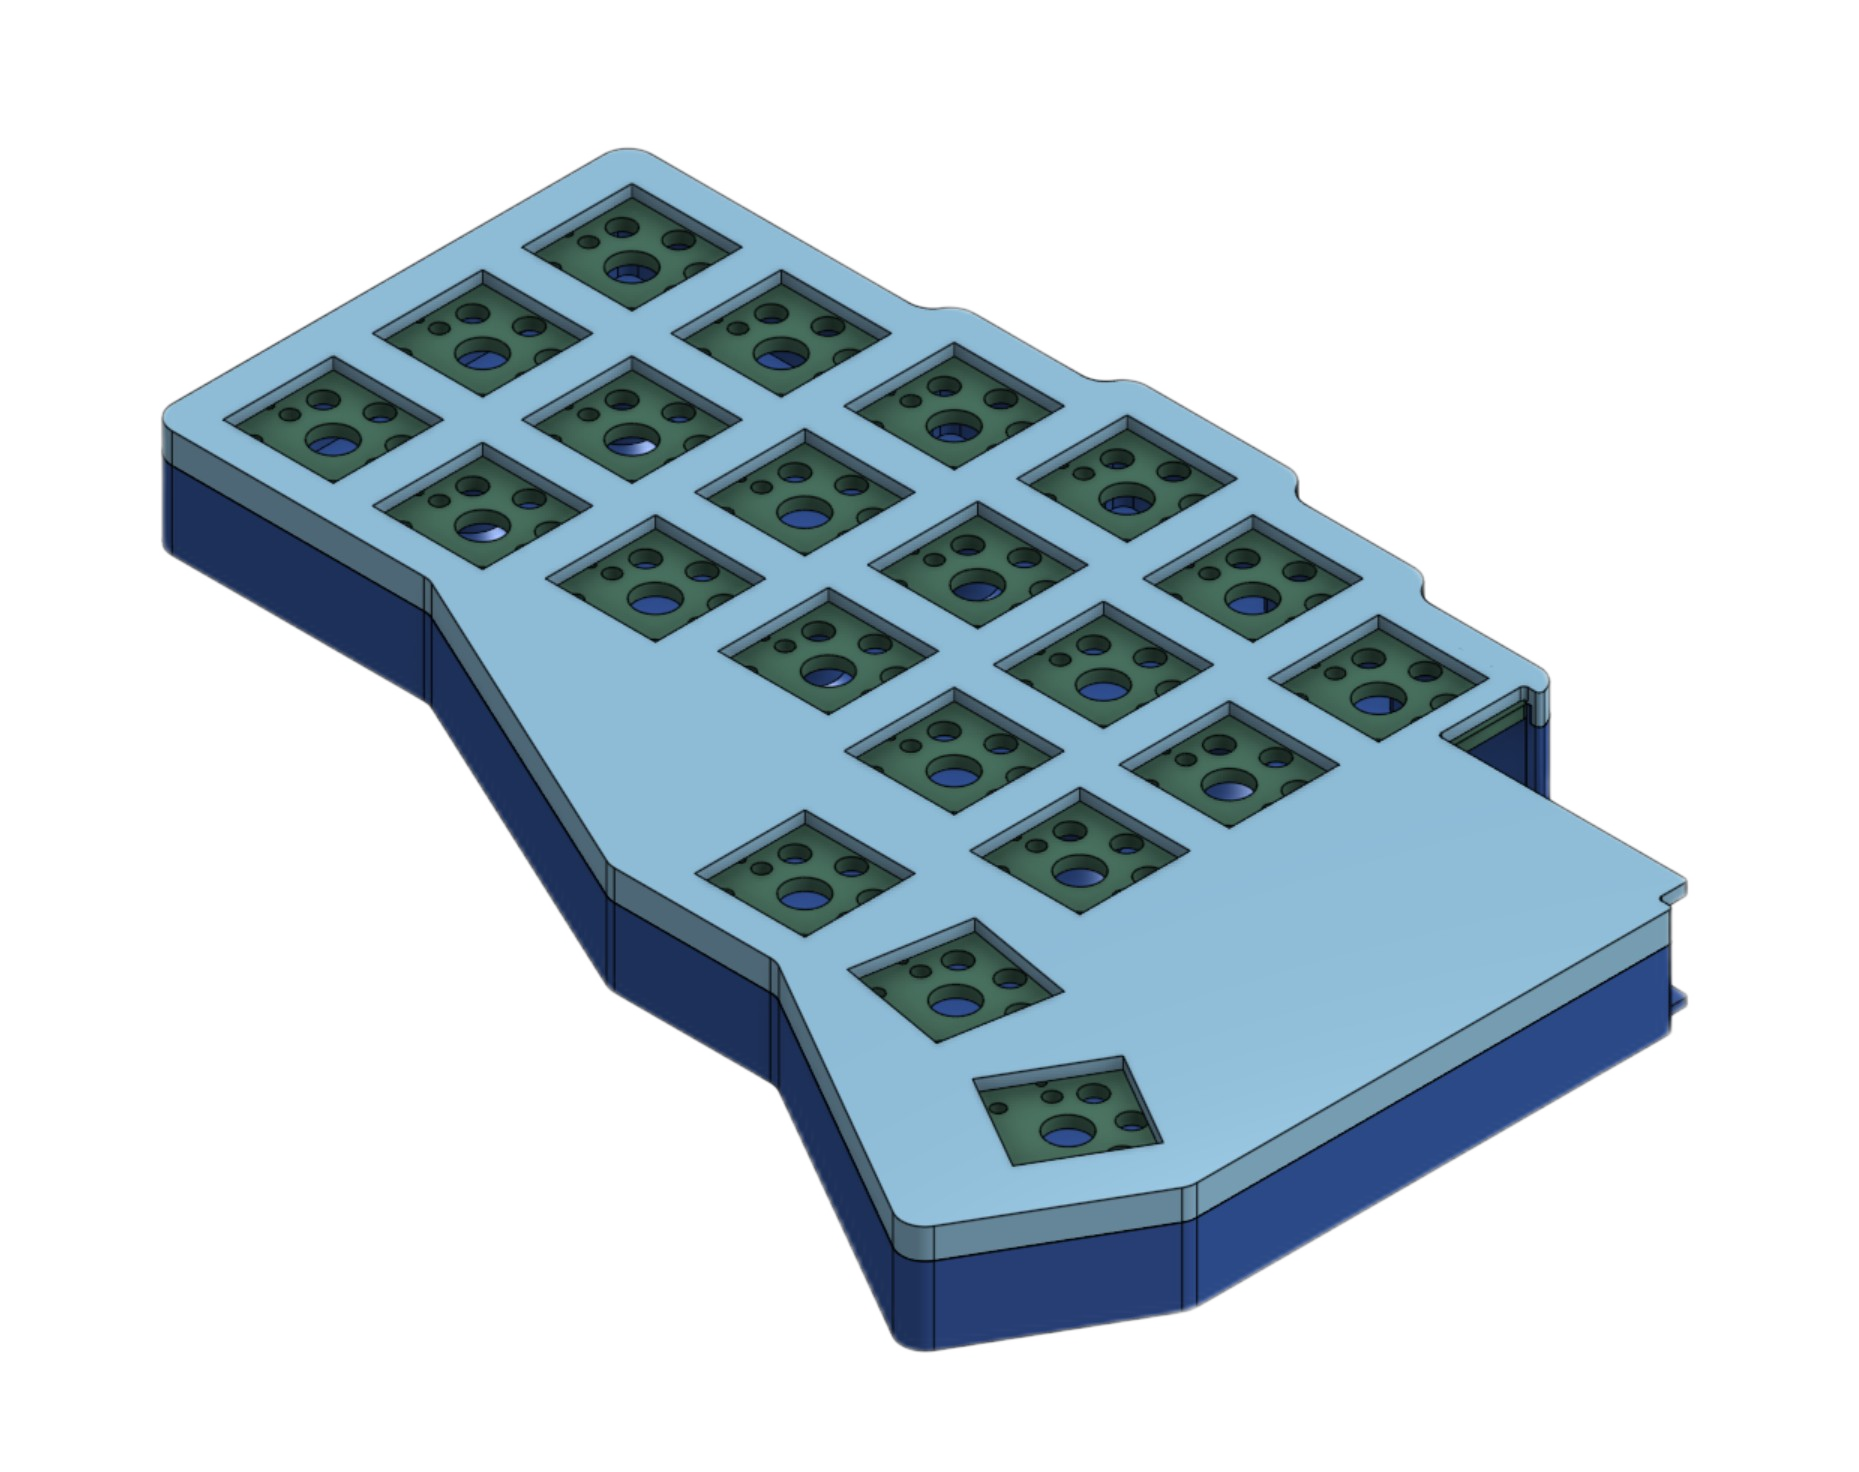
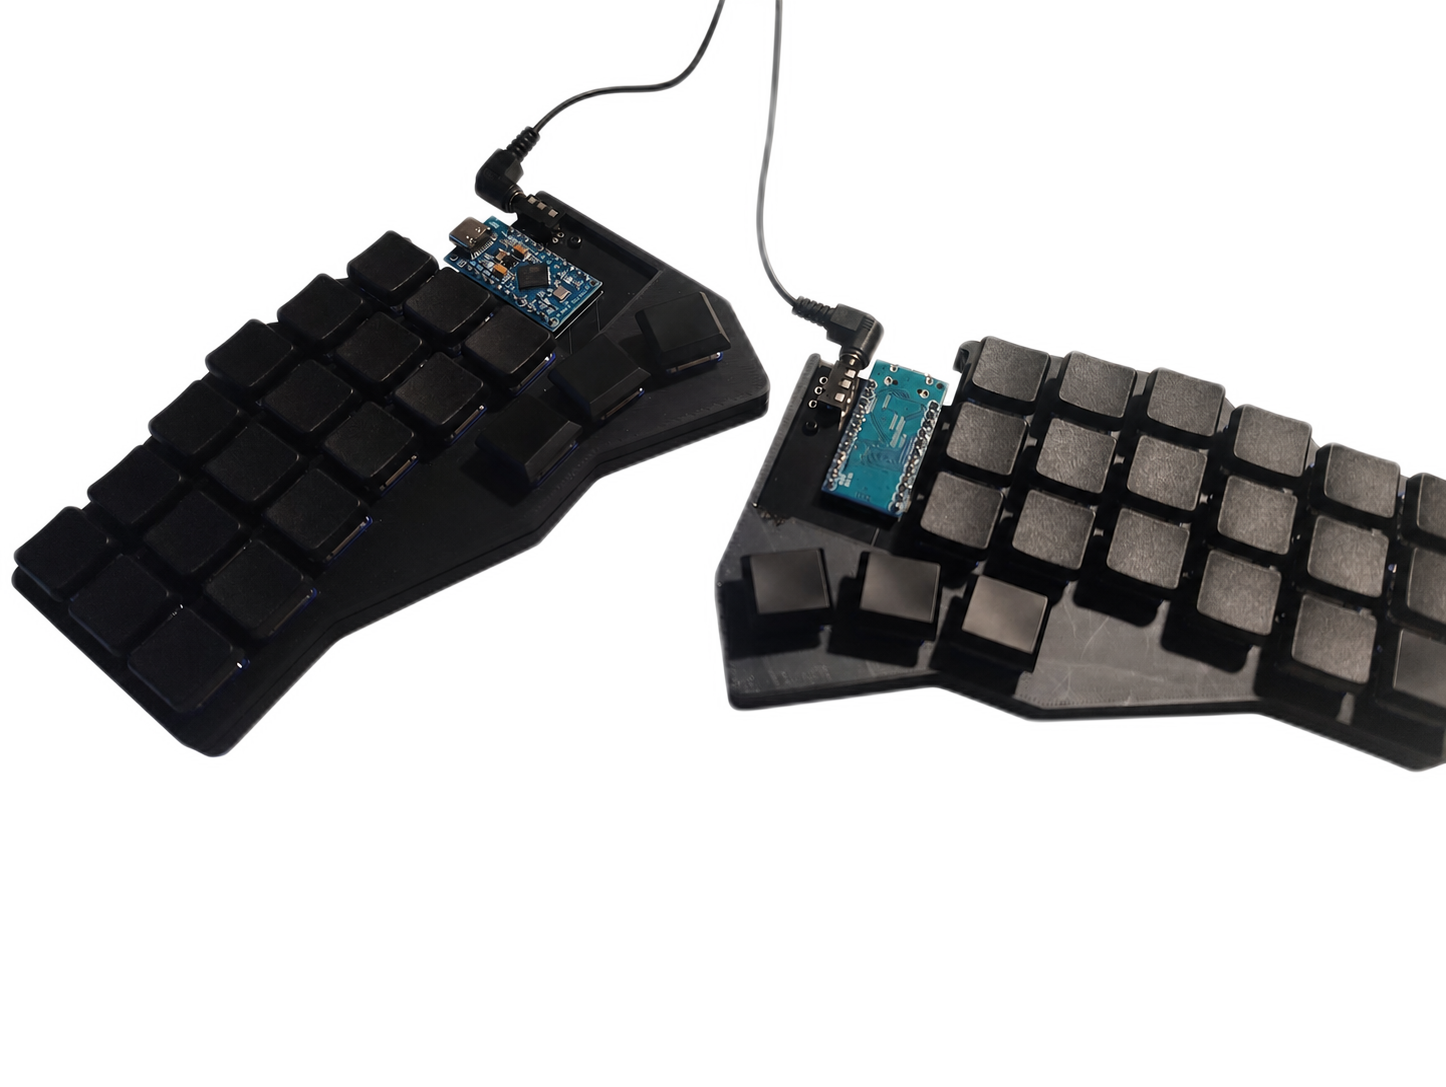
The enclosure was also designed specifically for Mark1. I used Onshape to model a case that holds everything together tightly, while also being easy to assemble and aesthetically pleasing (no visible screws!). The screenshow above is actually the first version of the case, which hides the arduino micro on the underside of the pcb. This was aesthetic, but a pain to type on because of the height. I explicitly wanted a low-profile keyboard, so I designed the case to have the arduino on top as you’ll see in the picture of it fully assembled.
I printed the final parts on my Bambu Lab P1S and iterated on the design until the boards fit correctly and the assembled keyboard felt sturdy during use.
V2 was a lot flatter than V1, which was awesome. I originally planned to iterate ont he design and add a section to cover the arduinos so that the keyboard felt less fragile. But after getting the keyboard working, I decided that the exposed controller gave it character and added to the scrappy feel you’d expect for an economically accessible split-key keyboard.
What I learned
Mark1 brought together PCB design, soldering, firmware development, mechanical design, and additive manufacturing in a single project. It was my first time designing a PCB, creating firmware for custom hardware, and building a keyboard whose electronic and physical design were entirely my own.
The result is a functional split keyboard tailored to my preferred ergonomics and layout—and a foundation for future hardware revisions and custom keyboard projects.
Note: This article is still lacking some detail and not fully in my style. I’ll continue to update it as I have more time to work on this.